

BY JON DICKENS
You and your buddy are out on a party boat fishing for yellowtail. It’s been a slow morning so far. More show than go. All of a sudden your friend hooks up, 15 minutes go by and after a lap around the boat, your bud comes walking back to the stern with the biggest smile on his face you’ve ever seen, and a yellow pushing 30 pounds!
You grab your smartphone and take a couple quick pictures to capture the “Kodak moment” for history and think in the back of your head, “Hey, I’m gonna surprise him and send the picture into Western Outdoor News. He’ll freak out if he sees his picture with his PB yellow in print.”
The bite turns on and you’d rather get a bait in the water than look to see that you got a good shot. Mistake. That night when you take a look at the two photos you grabbed, you’re bummed. In one shot, you cut off the top of his head, and the other has another fisherman walking into the frame and covering up part of the fish. No WON moment of fame this time.

Everyone’s a photographer these days
The camera phone has turned everyone into “photographers.” Some are very good at taking quality photos, some not so much.
While I don’t profess to be an exceptional photographer, I do okay. I became interested in photography in a college photojournalism class. From there I taught myself the basics and refined them during
a career of advertising and marketing, where one of the many hats I wore was that of the in-house photo guy. Now I shoot more for fun and have been fortunate to capture some photos that others have said are pretty good. One of the comments I occasionally get from friends that makes me chuckle is, “Wow, what a cool shot! You must have a really great camera.” Most of the time I just smile and say thanks, rather than explain it’s not the camera that made it a good shot.
The first time I realized that the camera on your phone could take great pictures was, of course, on a fishing trip. My fishing buddy and I were in Alaska, sitting next to a window while having dinner at a lodge. I looked out and couldn’t believe the sunset that was unfolding, and my “real” camera was back in the room. No time to go get it, so I pulled out my iPhone, fumbled to find the camera mode, held it steady and got some surprisingly great shots through the window. That was early on in the development of smartphone cameras and the moment I realized I could come close to what I got with an expensive 35mm digital SLR camera. To be clear, larger format cameras still have the capability to outshine camera phones. But the biggest advantage of camera phones is that unlike bulky cameras and lenses, you always have them with you, so you’re more apt to use them.
Everyone takes a great photo now and then. However, like anything in life, shooting consistently good photos takes some knowledge and experience. To improve your camera phone photos, start by focusing on three elements: Composition, lighting and editing. There are many more topics, but these will get you headed in the right direction.
Composing a great photo
Volumes have been written about how to compose a great photo, but I’ll boil it down to a few steps for fishing scenarios.

#1. Get closer. Most camera phone amateurs don’t get close enough to their subject when shooting people, or fish. It’s a common mistake. Try to fill the majority of the frame with what you want people to focus on. The temptation for some is to zoom in instead of taking a step closer. That can work, but if you want to print your photo and enlarge it substantially, the quality will suffer. Try to compose your picture the way you want it to end up, rather than relying on cropping and editing after the fact. More on that later.
#2. Look at the background. No one wants to see a fishing pole sticking out from behind their head, or half a person standing next to them. If it’s hard to get a clear background, move your position to get a different angle or try to move the subject if possible. And don’t be shy about asking someone to move away from your subject so you can get a clean shot. Try shooting from a kneeling position or hold the camera up high and shoot down. Mix it up. If you’re shooting just the fish, get down on the same plane as the fish and avoid unnecessary items around it.
It’s ok to break some photography rules. The horizon doesn’t always have to be parallel to the bottom of the photo, if it adds interest. You don’t always have to center your subject in the middle of the frame. Sometimes having more space on one side makes the shot more dramatic and interesting. Similarly, consider having your subject look at the catch or somewhere other than directly into the camera. Overall, try to be more aware of what’s around the subject and your photos will improve immensely.
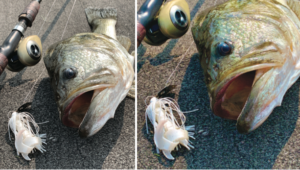
#3. Make the fish the star. When taking pictures of fish or fishermen with their catch, capturing the photo when the fish is alive and it’s colors and markings are bright makes a huge difference. Dead fish look like… dead fish. Whether alive or dead, rinse off any blood or debris. I know some revel in the bloody decks type photos, but it’s not the best image to share with most people.
Of course, the trick that most fishermen know is to hold the fish out in front of them so it looks bigger. Try to have your subject hold the fish with as much of their hands behind the fish as possible so you don’t see the size relationship of hand-to-fish. And if you’re able to hide their extended arms behind the fish as well, all of a sudden the fish looks twice as big!
Depending upon the size of the fish, holding it upright by inserting your fingers in the gill plate and extending your arm looks better than holding it by the tail. Or hold it horizontally, with one hand under the head and the other hand holding the tail. If it’s too big to hold — you lucky devil — get down on a knee next to the fish.
#4. Framing. Look for ways to naturally frame the subject, be it fish, human or scenery. Having something in the foreground that guides your eye to the subject can add a lot to a photo. If you’re shooting a bass in a net, use the curved edge of the net frame next to the fish to create a different look. On a party boat, take your shot of someone fighting a fish from a distance and use the perspective of the rail of the boat in the foreground. Add a fishing rod or gaff at an angle to the fish or fisherman. If someone caught a big tuna or fish with a v-shaped tail, have the lucky angler stand behind it and use the shape of the tail to frame their face. Get creative.
#5. Hold steady. Unless you’re trying to hold onto your camera phone with one hand and a railing with the other because it’s very nautical out there (rough seas), you should be able to avoid blurry pictures due to moving the camera. Try to lock your elbows against your body and hold the phone with both hands, with the palm or fingers of one hand underneath the phone, cradling it. If you can lean against something solid like a post and hold the phone against it, even better. Lighting
Next to composition, lighting is often the difference between a good photo and a great photo. Generally speaking, try to avoid shooting into the sun. There are some creative ways this can work, but it takes practice. If you’re taking the standard “grip and grin” photo, try to position your subject holding their fish so that the sun is facing them. Cloudy or overcast skies can be helpful in evening out the shadows, especially those that form under hats. But if you see an objectionable shadow forming there, have the subject tip the hat up to get some light on their face or remove it altogether, if you can’t move them somewhere where the lighting is more pleasing. Avoid shooting where shadows cause streaks across your subject.
Avoid using the flash mode on your camera phone. Most cameras today are fast enough to capture your shot without it. The flash creates hard shadows and doesn’t look as natural.
Time of day is another difference maker, especially when shooting landscapes or waterscapes. Early and late, when the sun is low on the horizon, gives
you warmer and more flattering light. Look too for reflections that add another dimension to your composition. If you’re shooting at sunset and you think you’re done because the sun just dipped below the horizon, wait. Often times, the best is yet to come. Mother Nature does some of her finest painting after the sun goes down. Of course having a tripod or means of holding the camera steady is helpful, but you can still capture some great shots without it if you’re careful.
Editing your photos
Editing photos after they’re taken is something that very few anglers or other smartphone users do. It’s perceived as not needed or just too much work. In reality, it’s not that hard. The editing modes that come on iPhones or Androids are fairly easy to learn. There are more complex programs like Photoshop and the like, but unless you want to substantially alter your images, the built-in programs are just fine. Personally, I’m not a fan of “altering” images by adding or subtracting elements. I prefer to just enhance what’s already there.
The beauty of digital images is that there is so much data and detail captured that you may not be aware of as compared to old-fashioned film. (Film still has its place and many pros still prefer it.) Your digital photo can be enhanced to add color, contrast, warmth and vibrancy, open up shadows, sharpen the image and more. The easy answer is to click the “auto” option, but don’t expect a lot of improvement there.
Instead, and to keep it simple, focus on just a few steps to start. I’d suggest “cropping”, “shadows,” “saturation,” and “brilliance.” If at any point you become frustrated or feel you’ve done more harm than good in your edits, you can always hit “reset” and go back to the original image. You can’t ruin a photo.
To begin, when looking at your photo, click “edit” and start with the “cropping” tool if your photo composition needs to be tweaked. You can straighten a horizon, eliminate unwanted portions of the photo, or just enlarge it to key in on the focal point.
After doing any cropping, I’d suggest using “shadows” to open up any dark shaded areas, concentrating on faces or whatever the focal point is. By sliding the scale left or right, you’ll see the changes in your photo as you lighten or darken the shadows.
Next go the “saturation” feature and use the slider to see if adding color makes a difference. Increasing the saturation level often makes your photos more dramatic and brings out hidden color that is embedded in the image. Don’t over-saturate though or the color will look unrealistic. Lastly, use the “brilliance” or “brightness” feature to add overall pop to your picture.
As you get more comfortable with these functions, consider trying more options. You can adjust the “contrast” if the image lighting is flat and you want to improve the dark to light tones. You can also toggle the “exposure” function if it’s really dark overall to brighten it up. “Sharpness” or “definition” can help if the image is not as crisp as you hoped for. Ed iting can make a considerable difference in the look of your photos. It’s most usually worth the effort.
Oh, a couple final tips. Don’t forget to clean the lens on your phone’s camera every once in a while with a soft cloth. Fish slime and scales don’t make for quality photos either.
